BlueKite was playing around and decided she wanted to go flying with me.
So, she created this fun piece of artwork.
Just print it, cut it out, and put it together per the illustrations below.
How it flies depends on you.
Farloft - Flying Dragon
.jpg)
There is a front and back to both pieces.
One sheet for three different head expressionsOne sheet for the body


My legs are cut separated from the wings so they will fold down.

Four places to tape: #1 Tape - Bottom of head to belly
.jpg)
#2 Tape - Top of head to top of body (line it up with the outline)

Fold head down & body up: #3 Tape - Tip of folded nose and over back on legs
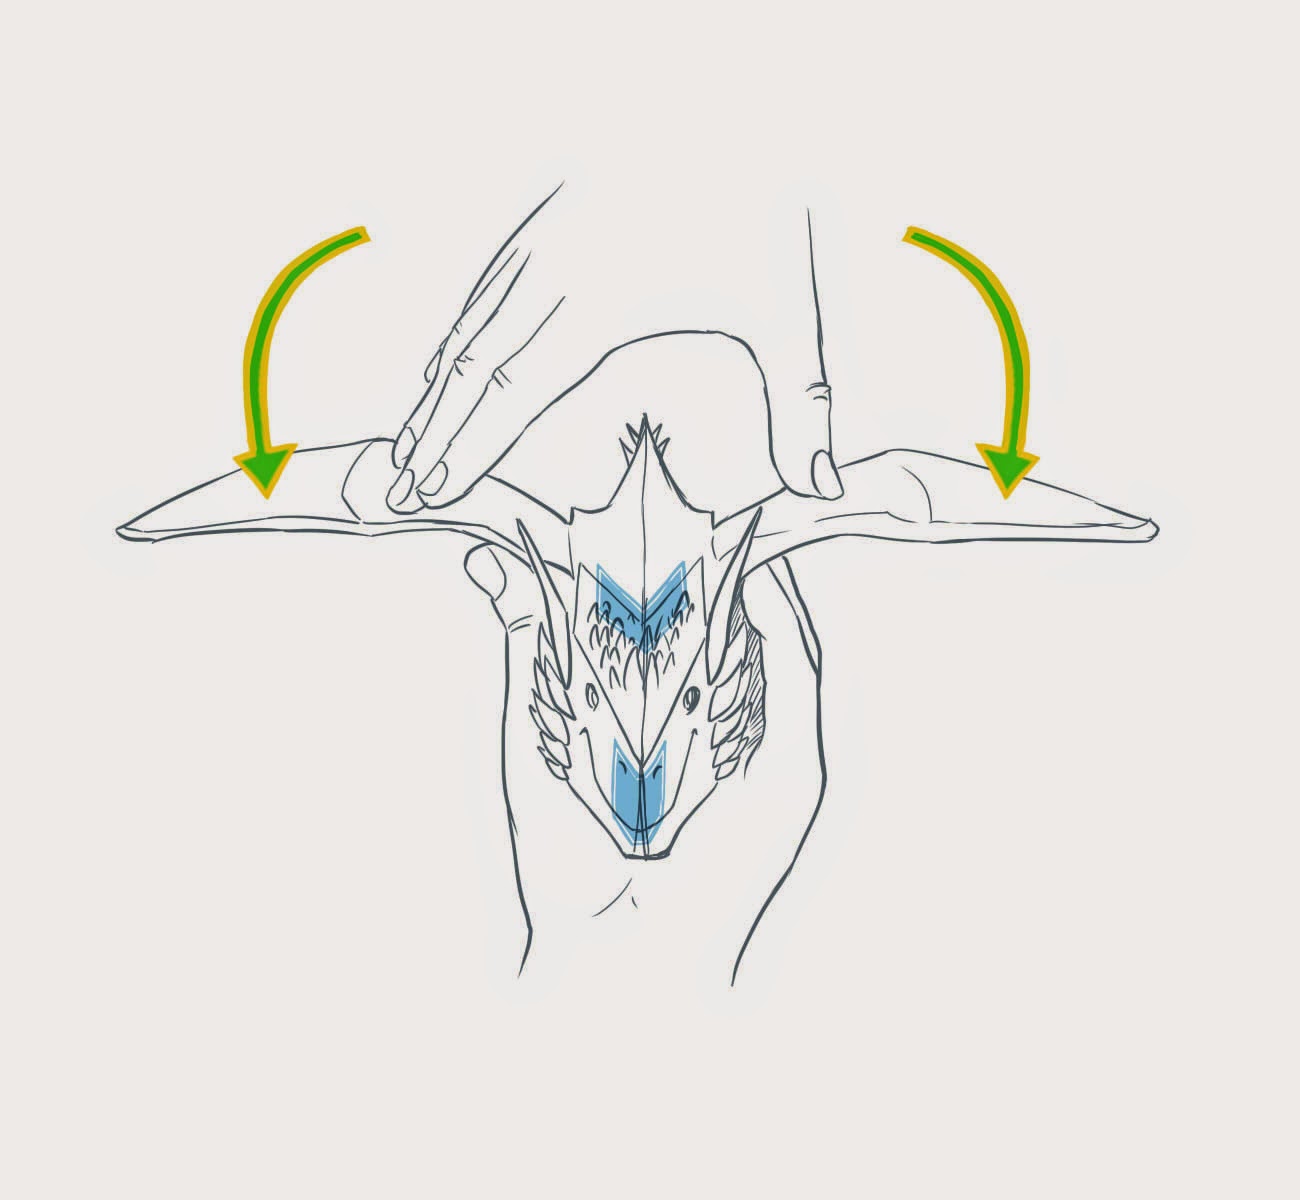
Press the wings down to give them a curve as if I were in flight

Give my tail a bit of a bend up, by running you fingers along the paper

I might need a little more weight on my neck depending on what paper you are using.
Theresa needed one neck piece when she flew me in 20# copy paper and
two neck weights when she used heavier cover stock
two neck weights when she used heavier cover stock
If so, just cut out another neck piece and attach to the neck on the belly-side.

Consider the way you 'hold' me and 'launch' me.
Nose up... Nose down... Straight...
- Happy Flying -
PDF for 2-sided body and head pieces below
No comments:
Post a Comment